

Scanning Your Mac for Viruses
As Mac OSX users, we enjoy relative security from the threat of viruses. No system is entirely impervious to threats, however, so in order to protect sensitve company and client data we ask that everyone run a periodic scan of their hard drive with ClamAV, an open source antivirus scanner.
- Installing and Setting Up ClamAV
To begin using ClamAV, you first need to install and set it up. Here are the steps:
-
Open the Terminal application on your Mac.
Terminal window $ brew install clamav$ brew link clamavIf you encounter a warning message stating
usr/local/sbin is not writablewhile trying to link, you’ll need to create a new directory and modify its ownership. This can be done by executing the following commands:Terminal window $ sudo mkdir /usr/local/sbin$ sudo chown -R `whoami`:admin /usr/local/sbin -
Navigate to the ClamAV configuration directory:
Terminal window $ cd /usr/local/etc/clamavMake a copy of the
freshclam.conf.samplefile in the same directory but with a new namefreshclam.conf:Terminal window $ cp freshclam.conf{.sample,} -
Edit the
freshclam.conffileOpen the ‘freshclam.conf’ file and look for a line that says,
Example. Comment out this line by adding a#at the beginning of the line. This line is inserted by ClamAV to ensure we manually edit the configuration file.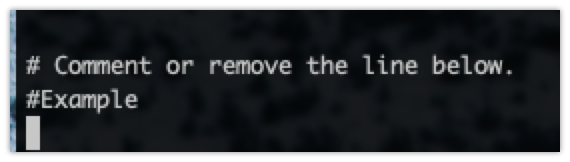
Once done, save and close the file.
-
Updating the ClamAV Database
After setting up ClamAV, the next step is to update its database. This is done using the following command in the terminal:
Terminal window $ freshclam -v -
Running a Full Virus Scan
Once your ClamAV database is updated, you can perform a full scan of your hard drive. The following command initiates a full scan, with a notification (a bell sound) for any detected infected files:
Terminal window $ clamscan --recursive --bell --infected /If during the scanning process or while updating the database, you encounter a warning stating, “WARNING: Your ClamAV installation is OUTDATED!”, you can update ClamAV using the command:
Terminal window $ brew upgrade clamav -
Interpreting the ClamScan Results
Upon running the scan, ClamAV will present a list of infected files, if any. The
--infectedflag in the scan command ensures that only infected files are listed, making it easier for you to focus on problem areas. Each line will represent a file and its infection status. Any necessary action, such as deleting or quarantining the file, can then be taken based on these results. -
Estimating the Scan Duration
The duration of the scan depends on several factors, such as the size of your hard drive, the number of files, and the performance capabilities of your computer. On average, a comprehensive scan could take anywhere from a few minutes to several hours. It’s generally recommended to run such scans during non-peak hours or when you won’t need to use your computer extensively.